
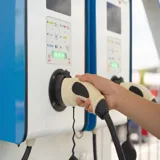
EV Charger Blinking Lights: What Every Color and Pattern Means
Your EV charger is blinking, and you have no idea what it means. Is it charging? Is something wrong? Is it about to catch fire? Deep breath — your charger is trying to tell you something, and once you speak its language, you will know exactly what to do in seconds.
Every EV charger uses LED lights to communicate its status, and while each brand has its own patterns, the color coding is surprisingly consistent across the industry. Green means ready, blue means charging, red means error, and yellow means warning or standby. In this guide, we decode every color and blink pattern for the five most popular home charger brands, give you instant troubleshooting steps for each, and tell you when a light pattern means a quick fix versus a hardware failure that needs replacement.
Preise, Verfügbarkeit und Programmbedingungen können sich ändern. Zuletzt geprüft: 17.04.2026. Alle Angaben ohne Gewähr.
Universal Light Code Guide
The EV charger industry has converged on a loose color standard. While blink patterns and specific meanings vary by brand, the base color always tells you the general category of what is happening. Learn these four colors and you can read any charger at a glance.
| LED Color | Universal Meaning | Your Response |
|---|---|---|
| Green | Powered on, ready, standby — no vehicle connected or charge complete | No action needed. Charger is working normally and waiting for a vehicle. |
| Blue | Vehicle connected and actively charging (or connected and waiting) | No action needed. Check if solid blue (charging) or pulsing blue (waiting/scheduled). |
| Yellow / Amber | Warning condition — reduced power, temperature limit, firmware update, or standby with vehicle connected | Not urgent but investigate. Check for throttling, schedule, or update in progress. |
| Red | Fault detected — charging has stopped for safety | Action required. Identify the fault type (see brand-specific tables below) and resolve it. |
Solid vs Blinking: Why It Matters
The pattern of the light is just as important as the color:
- Solid (steady): A stable state. Solid green = standby. Solid blue = charging. Solid red = persistent fault.
- Pulsing (breathing): A transitional state. The light slowly fades in and out. Pulsing blue = vehicle connected but not actively drawing power (scheduled charge, battery full, or car-side delay).
- Blinking (flashing): Attention needed. The light turns on and off sharply. Blinking red = active fault. Blinking yellow = firmware update or self-test in progress.
- Blink count: Many non-smart chargers (Grizzl-E, Lectron) use the number of blinks per cycle as an error code. Two red blinks = ground fault. Three red blinks = stuck relay. Four red blinks = over-temperature. Count the blinks carefully, noting the pause between cycles.
No Light at All
If your charger has no LED illumination whatsoever, it has no power. This is not an error code — it means electricity is not reaching the unit. Check:
- Circuit breaker: Is it tripped? A 240V double-pole breaker may sit in a middle position when tripped. Push firmly to OFF, then back to ON.
- NEMA 14-50 outlet (plug-in chargers): Is the plug fully seated? Is the outlet working? Test with a multimeter or plug in something else.
- Hardwired connections: Turn off the breaker and check the wiring compartment for loose terminals or disconnected wires.
- GFCI reset button: Some chargers (JuiceBox, some ChargePoint models) have an external GFCI button that can trip. Look for a small reset button on the charger face or bottom.
For detailed breaker troubleshooting, see our breaker trip guide.
Multiple Colors (Alternating)
Some chargers display alternating colors (e.g., red/green) to indicate specific conditions, usually temperature-related. The Grizzl-E Classic uses alternating red/green to signal over-temperature protection. If you see alternating colors, check your charger's specific brand table below.
Brand-by-Brand Light Meanings
Here is the complete LED reference for the five most popular home EV charger brands. Bookmark this section — you will want it the next time your charger shows an unfamiliar light.
ChargePoint Home Flex
Uses a ring light around the front panel. The ChargePoint app provides additional detail beyond the LED.
| LED Pattern | Meaning | Action |
|---|---|---|
| Pulsing green | Powered on, ready, no vehicle | Normal standby |
| Solid blue | Charging in progress | Normal — check app for charge rate and time remaining |
| Pulsing blue | Vehicle connected, charge scheduled or complete | Check schedule settings in app; verify battery level |
| Blinking yellow | Ground fault detected | Disconnect vehicle, dry connector, power cycle at breaker |
| Solid yellow | Firmware update in progress | Do not unplug — wait 5–15 minutes |
| Solid red | Hardware fault or overcurrent | Power cycle. If red persists, contact ChargePoint support. |
| Flashing red | GFCI trip / critical ground fault | See error codes guide for GFCI reset procedure |
| No light | No power to unit | Check breaker, outlet, and GFCI reset button |
Wallbox Pulsar Plus
Uses a halo light ring with color and animation changes. The myWallbox app shows specific error codes (ERR-XXX format).
| LED Pattern | Meaning | Action |
|---|---|---|
| Breathing blue | Powered on, ready, waiting for vehicle | Normal standby |
| Cyan flow (moving) | Actively charging | Normal — color intensity increases with charge speed |
| Solid green | Charge complete | Vehicle battery is full (or at set limit) |
| Red pulsing | Ground fault / ERR-001 | Power cycle, check for moisture, verify grounding |
| Orange solid | Overcurrent / ERR-002 | Reduce amperage in app; verify breaker matches setting |
| Red solid | Over/undervoltage / ERR-003 | Check supply voltage with multimeter (220–250V range) |
| Red blinking | Communication error / ERR-007 | Re-seat J1772 connector, clean pins, try different vehicle |
| Yellow pulsing | Firmware update in progress | Do not unplug — wait 5–15 minutes for completion |
| Purple | Charger is locked (via app or NFC) | Unlock in myWallbox app to enable charging |
Grizzl-E Classic
Uses a single multi-color LED on the front face. No app — all diagnostics rely on the LED alone. Count the blinks carefully for error identification.
| LED Pattern | Meaning | Action |
|---|---|---|
| Solid green | Powered on, standby, no vehicle | Normal — ready to charge |
| Solid blue | Vehicle connected, charging in progress | Normal operation |
| Red — 2 blinks | GFCI fault detected | Power cycle at breaker (off 30 sec, on). Inspect connector for moisture, dirt, or bent pins. |
| Red — 3 blinks | Relay stuck closed (welded contactor) | Power cycle first. If recurring, this is a hardware failure — contact Grizzl-E for warranty. |
| Red — 4 blinks | Pilot signal error (no vehicle communication) | Disconnect, clean connector pins, reconnect firmly. If persistent across vehicles, pilot circuit may be faulty. |
| Alternating red/green | Internal temperature too high | Allow unit to cool. Check ventilation. Avoid charging in direct sun during extreme heat. |
| No light | No power | Check breaker and wiring |
Lectron V-Box 48A
Uses a simple LED indicator strip. No WiFi or app — all diagnostics through the LED. Like the Grizzl-E, blink count matters.
| LED Pattern | Meaning | Action |
|---|---|---|
| Solid green | Powered on, ready | Normal standby |
| Solid blue | Charging in progress | Normal operation |
| Yellow solid | Vehicle connected but not drawing power | Check vehicle charge schedule; ensure port is fully latched |
| Red — 2 blinks | Ground fault / GFCI trip | Press the reset button on the unit, or power cycle at breaker. Check connector for moisture. |
| Red — 3 blinks | Stuck relay (welded contactor) | Power cycle at breaker. If it persists, hardware failure — contact Lectron for warranty. |
| Red — 4 blinks | Over-temperature protection | Let unit cool. Ensure ventilation. Avoid direct sunlight in extreme heat. |
| No light | No power | Check breaker, outlet, and wiring |
Emporia Energy Smart Level 2
Uses a front LED ring with detailed diagnostics available through the Emporia Energy app, including real-time power data.
| LED Pattern | Meaning | Action |
|---|---|---|
| Green ring | Connected to WiFi, standby | Normal — ready for vehicle |
| Blue ring | Charging in progress | Normal operation — check app for live power data |
| Red ring | Ground fault / GFCI trip | Reset via app or power cycle at breaker. Check connector and outlet grounding. |
| Yellow ring (solid) | Load management active — power reduced to protect panel | Normal if CT clamps are installed. Power increases automatically when other loads decrease. |
| Yellow ring (flashing) | WiFi connection lost | Charger still works offline. Check router, re-run WiFi setup if needed. |
| Red ring (pulsing) | Over-temperature protection | Allow charger to cool. Resume automatically when safe temperature reached. |
| White ring | Initial setup mode / pairing | Open Emporia app to complete WiFi setup |
Troubleshooting Flashing Patterns
Flashing (rapid on/off) patterns always indicate that the charger needs attention. Here is a systematic approach to resolving them, organized by what you see.
Flashing Red: Fault Detected
A flashing red LED is the most urgent indicator. Charging has stopped and will not resume until the fault is cleared.
Step 1: Count the blinks. For non-smart chargers (Grizzl-E, Lectron), the number of blinks per cycle is the error code. Watch for 10–15 seconds and count the blinks before the pause repeats.
Step 2: Match the blink count to the cause:
| Blink Count | Most Likely Cause | Fix |
|---|---|---|
| 2 blinks | Ground fault / GFCI trip | Dry the connector, power cycle at breaker. If recurring, check for dual GFCI conflict or damaged cable insulation. |
| 3 blinks | Stuck relay (contactor welded shut) | Power cycle may clear temporarily. If it recurs, the relay has physically failed — the charger needs warranty replacement. |
| 4 blinks | Pilot signal error OR over-temperature (brand-dependent) | Clean connector pins and re-seat (pilot error). Let charger cool and check ventilation (temperature). |
| Continuous rapid blinking | Critical fault — overcurrent, short circuit, or internal component failure | Do not attempt to reset repeatedly. Turn off the breaker and inspect for damage. Call an electrician if you see scorch marks or smell burning. |
Step 3: Power cycle. After identifying the cause, turn off the breaker for 30 seconds, then turn it back on. Wait for the standby light before reconnecting the vehicle. If the flashing red returns immediately, the underlying cause has not been resolved.
Flashing Yellow: Warning or Update
A flashing yellow LED is less urgent than red. Common meanings:
- Firmware update in progress: Do NOT unplug or power cycle the charger during a firmware update. Wait 5–15 minutes. If it takes longer than 30 minutes, then power cycle to force a restart.
- Self-test / initialization: Some chargers perform a self-test on power-up that shows flashing yellow for 10–30 seconds. This is normal and will transition to green standby.
- WiFi disconnected (Emporia): The charger lost its WiFi connection. Charging still works, but you lose app control. Check your router and reconnect.
- Ground fault warning (ChargePoint): The ChargePoint uses blinking yellow specifically for ground fault detection, unlike most other brands that use red.
Flashing Blue: Communication or Scheduling
A flashing or pulsing blue LED almost always means the vehicle is connected but a charge session has not started:
- Vehicle charge schedule is delaying the session
- Smart charger schedule is delaying the session
- Vehicle is preconditioning the battery before accepting charge
- Charge complete — battery reached the set limit
Check both the vehicle's dashboard and the charger's app for scheduling details.
Flashing Green: Ready With Issues
Flashing green is less common but typically means:
- Charger is in standby but has a minor issue (weak WiFi, pending update)
- Tesla Wall Connector: flashing green means charging is in progress (Tesla uses green for active charging, unlike most brands that use blue)
Quick Fix Guide: Resolve Any Light Issue in Minutes
Use this flowchart to resolve any LED indicator issue as quickly as possible.
LED Troubleshooting Flowchart
What color is your charger's LED?
No light:
→ Check breaker (push OFF then ON to reset)
→ Check outlet/plug connection
→ Check GFCI reset button on charger
Green:
→ Normal standby. If vehicle is plugged in but green, re-seat the J1772 connector firmly.
Blue:
→ Solid = charging normally. Pulsing = vehicle connected, waiting for schedule or at charge limit.
Yellow:
→ Solid = temperature throttling or load management. Flashing = firmware update (wait) or WiFi issue.
Red:
→ Step 1: Unplug vehicle. Step 2: Power cycle at breaker (30 sec off). Step 3: Wait for green standby. Step 4: Reconnect vehicle.
→ If red returns, count blinks and match to error table above.
The Universal Fix: Power Cycle
A breaker power cycle resolves roughly 80% of all LED fault conditions. Here is the correct procedure:
- Disconnect the J1772 connector from the vehicle
- Turn off the circuit breaker at the electrical panel
- Wait 30 seconds (allows internal capacitors to fully discharge and clears all fault states)
- Turn the breaker back on
- Wait for green standby light (confirms self-test passed)
- Reconnect the vehicle
If the fault light returns after a power cycle, the issue requires further investigation — either the root cause is still present (moisture, loose wiring, temperature) or there is a hardware failure.
Fix-By-Symptom Quick Reference
| Symptom | Most Likely Cause | Fix | Time |
|---|---|---|---|
| Red light after rain | Moisture on connector pins | Wipe connector dry, store pins-down | 1 min |
| Red light in hot weather | Over-temperature protection | Wait for unit to cool; charge at night | 15–30 min |
| Yellow light during charging | Load management throttling | Normal — reduce other household loads for faster charging | None |
| Pulsing blue, not charging | Vehicle charge schedule active | Disable schedule in vehicle infotainment | 1 min |
| Green with vehicle plugged in | Connector not fully seated | Remove and reinsert J1772 until it clicks | 30 sec |
| Alternating red/green | Grizzl-E over-temperature | Allow to cool, improve ventilation | 15–30 min |
| Purple (Wallbox only) | Charger locked via app | Unlock in myWallbox app | 30 sec |
| White ring (Emporia only) | Setup/pairing mode | Complete WiFi setup in Emporia app | 5 min |
When Lights Indicate Hardware Failure
Most LED fault conditions are resolved by a power cycle, connector cleaning, or adjusting a setting. But some light patterns indicate actual hardware failure that requires replacement. Knowing the difference saves you from wasting time troubleshooting a dead charger.
Hardware Failure Indicators
| LED Pattern | After Power Cycle | Diagnosis | Action |
|---|---|---|---|
| 3 red blinks (stuck relay) | Returns immediately every time | Internal contactor has physically welded shut or open. This is a mechanical failure that cannot be reset by power cycling. | Contact manufacturer for warranty replacement. Do not continue using — a stuck relay can cause uncontrolled power delivery. |
| Solid red that never clears | Returns within seconds of power-on | Internal control board failure, damaged relay driver, or blown internal fuse. | Contact manufacturer. If out of warranty, replacing the charger ($300–$350) is usually cheaper than board repair. |
| LED flickers or shows wrong colors | Inconsistent behavior across cycles | LED driver circuit or control board degradation, possibly from a power surge or moisture ingress. | If charging still works but the LED is unreliable, the charger is still functional. If charging is also inconsistent, replace the unit. |
| No light at all (breaker confirmed ON, wiring verified) | N/A — unit has no power despite good supply | Internal fuse blown, power supply board failure, or thermal damage to internal components. | If the charger has an internal fuse, check the manual for location and replacement. Otherwise, replace the charger. |
| GFCI fault (2 red blinks) on every attempt after connector cleaned and wiring verified | Returns every time, even with a different vehicle | Internal GFCI sensor has degraded or failed. The sensor is detecting phantom faults that do not exist. | Replace the charger. Internal GFCI sensor replacement is not user-serviceable. |
How Long Do EV Chargers Last?
Most home EV chargers are designed for 5–10 years of daily use. The components most likely to fail first are:
- Internal relay/contactor: Rated for 10,000–100,000 cycles (a daily charge session is one cycle). Budget chargers tend to use lower-rated relays.
- GFCI sensor: Can degrade after years of exposure to power surges, moisture, and thermal cycling.
- Charging cable: UV exposure, freezing temperatures, and mechanical stress (bending, coiling, running over with car tires) degrade the insulation over time.
- WiFi/control board: Smart charger electronics can fail from power surges or firmware corruption. Non-smart chargers (Grizzl-E, Lectron) avoid this failure mode entirely.
Warranty Coverage for LED-Indicated Faults
Most EV charger warranties cover hardware failures indicated by fault LEDs:
- ChargePoint Home Flex: 3-year warranty, covers all internal component failures
- Wallbox Pulsar Plus: 3-year warranty, covers defects in materials and workmanship
- Grizzl-E Classic: 3-year warranty, known for hassle-free replacements
- Lectron V-Box: 1-year warranty (shorter than most, but the price is hard to beat)
- Emporia Smart: 3-year warranty, covers hardware defects
Before filing a warranty claim, document the LED fault pattern (take a video), note how many power cycles you have attempted, and have your purchase receipt ready. Most manufacturers will ship a replacement after phone-based troubleshooting.
Choosing a Reliable Replacement
If your charger has reached end of life, the safest choices for reliability are chargers with the fewest failure points:
- The Lectron V-Box ($304) has no WiFi, no app, and minimal electronics — the fewer components, the fewer things that can fail.
- The Grizzl-E Classic ($300) has a NEMA 4X aluminum enclosure rated from -30°F to 122°F, adjustable amperage via DIP switches, and zero smart features to go wrong.
Both units have built-in GFCI protection, 24-foot cables, and J1772 connectors compatible with every non-Tesla EV (and Teslas with a NACS adapter). For a full reliability comparison, see our error codes troubleshooting guide.
Empfohlene Produkte
Als Amazon-Partner verdienen wir an qualifizierten Verkäufen — ohne Mehrkosten für Sie. Mehr erfahren
Lectron V-Box 48A
Lectron
Our top-rated budget Level 2 charger. Delivers 48A (11.5 kW) for the fastest home charging at this price. Built-in GFCI, NEMA 4 enclosure, and 24-foot cable. No WiFi — zero connectivity issues.
Grizzl-E Classic 40A
Grizzl-E
The most durable home EV charger on the market. NEMA 4X aluminum enclosure rated from -30°F to 122°F. Adjustable amperage (16/24/32/40A). Designed and tested in Canada for extreme weather reliability.
Verwandte Artikel & Tools
Häufig gestellte Fragen
What does a red light on my EV charger mean?
Why is my EV charger blinking blue but not charging?
What does a yellow light on my EV charger mean?
Why does my EV charger have no lights at all?
How do I count blink codes on my EV charger?
Is it safe to use my EV charger with a yellow warning light?
What does a purple light on my Wallbox charger mean?
When should I replace my EV charger instead of troubleshooting?
CheapEVCharger Redaktion
Unabhängiges Redaktionsteam für E-Mobilität. Wir vergleichen Wallboxen anhand von Herstellerspezifikationen, verifizierten Amazon-Kundenbewertungen und aktuellen Preisdaten — ohne Einfluss von Herstellern.
Datenquellen: Produktspezifikationen von Herstellerwebseiten, Preise und Kundenbewertungen von Amazon.de und Amazon.com, Installationskosten aus Branchenberichten, Energiepreise von U.S. EIA und BDEW.
Gefällt Ihnen dieser Artikel?
Erhalten Sie wöchentlich die besten E-Auto-Tipps und Wallbox-Angebote direkt in Ihr Postfach.
Kein Spam. Jederzeit abmeldbar.