
EV Charger Error Codes & Troubleshooting: Fix Common Problems Fast
Quick answer: Most home EV charger errors are fixable yourself in under 10 minutes. The most common issue is a GFCI ground-fault trip, usually caused by moisture in the J1772 connector. A power cycle at the breaker (off 30 seconds, then back on) resolves roughly 80% of errors, including fault lights on ChargePoint, Wallbox, and Grizzl-E units.
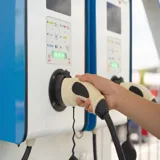
Your EV charger was working perfectly — until it was not. Now there is a blinking red light, your car is not charging, and you are staring at a cryptic error code wondering if you need an electrician or just a reboot. Sound familiar?
EV charger problems are more common than most owners expect, and the majority of them have simple fixes you can handle yourself in under 10 minutes. From GFCI ground faults (the single most common issue) to WiFi connectivity drops, temperature-related throttling, and brand-specific error codes, this guide covers every scenario you are likely to encounter with a home Level 2 charger.
We have compiled real error codes and troubleshooting steps for the most popular home charger brands — ChargePoint, Wallbox, Lectron, Grizzl-E, Emporia, and JuiceBox — along with clear guidance on when you can fix it yourself and when it is time to call a licensed electrician.
Prices, availability, and program terms are subject to change. Last verified: July 7, 2026. We strive for accuracy but recommend verifying details before purchase.
How EV Charger Error Indicators Work
Every home EV charger uses some combination of LED indicator lights, audible alerts, and app notifications to communicate its status. Before you can troubleshoot a problem, you need to understand what your charger is telling you.
LED Color Codes: The Universal Language
While every manufacturer has its own specific patterns, the EV charger industry has settled on a loose color standard that most brands follow:
| LED Color | General Meaning | Action Required |
|---|---|---|
| Solid Green | Charger is powered on, ready, and no vehicle is connected | None — normal standby |
| Solid Blue | Vehicle is connected and actively charging | None — normal operation |
| Pulsing / Breathing Blue | Vehicle is connected but not drawing power (scheduled charge, full battery, or vehicle-side delay) | Check vehicle charge schedule or battery level |
| Solid Yellow / Amber | Warning condition — charging may be reduced or paused | Check for temperature throttling, reduced power, or ventilation issues |
| Blinking Yellow | Charger is updating firmware or performing self-test | Wait for process to complete (do not unplug) |
| Solid Red | Fault detected — charging has stopped | Identify and resolve the fault (see sections below) |
| Blinking Red | Critical fault — GFCI trip, ground fault, or overcurrent detected | Disconnect vehicle, reset charger, check wiring |
| No Light | No power reaching the charger | Check circuit breaker, wiring, and outlet |
Blinking Patterns Matter
Pay close attention to how the light blinks, not just the color. Many chargers use blink count to communicate specific error codes. For example, a Grizzl-E charger blinking red 4 times means something different than 2 blinks. Count the blinks in each cycle, note any pauses, and match them to your charger's manual. We have compiled the most common patterns for major brands in the next section.
Smart Charger App Notifications
If you have a WiFi-enabled charger (Wallbox, ChargePoint, Emporia, JuiceBox), the companion app usually provides more detailed error messages than the LED alone. When you see a fault light, your first step should be to open the app — it will often tell you exactly what went wrong, along with a specific error code. Keep the app installed and notifications enabled, even if you do not use scheduling features. That way, you will get an alert on your phone the moment something goes wrong, rather than discovering your car did not charge the next morning.
The Vehicle's Dashboard vs the Charger
Remember that your vehicle has its own charging error indicators separate from the charger. If the charger shows green/blue (normal) but the car is not charging, the problem is likely on the vehicle side — check the car's infotainment display for messages about charge port issues, battery temperature conditioning, or scheduled departure settings.
Common Error Codes by Brand
Below are the most frequently encountered error codes and LED patterns for the six most popular home EV charger brands. If your charger is not listed here, check the manufacturer's support page or user manual — most use similar patterns to those described above.
ChargePoint Home Flex
The ChargePoint Home Flex uses a ring light around its front panel and provides detailed error messages through the ChargePoint app.
| LED Pattern | Meaning | Fix |
|---|---|---|
| Pulsing green | Ready, no vehicle connected | Normal — no action needed |
| Solid blue | Charging in progress | Normal — no action needed |
| Blinking yellow | Ground fault detected | Disconnect vehicle, reset charger by cycling breaker off for 30 seconds, reconnect. If it persists, check for moisture in the connector or outlet. |
| Solid red | Hardware fault or overcurrent | Power cycle the unit. If the red light returns, contact ChargePoint support — this typically indicates a relay or internal component failure. |
| Flashing red | GFCI trip / ground fault | See the GFCI troubleshooting section below for detailed steps. |
| No light | No power to unit | Check circuit breaker. If breaker is on, check wiring connections at the charger and panel. |
Wallbox Pulsar Plus
The Wallbox uses a halo light ring that changes color and pattern. The myWallbox app provides specific error codes (format: ERR-XXX).
| LED Pattern / App Code | Meaning | Fix |
|---|---|---|
| Breathing blue | Ready, waiting for vehicle | Normal standby |
| Cyan flow | Actively charging | Normal operation |
| Red pulsing / ERR-001 | Ground fault or leakage current detected | Power cycle the charger. Check connector for moisture or debris. If recurring, test the outlet wiring for proper grounding. |
| Orange / ERR-002 | Overcurrent protection triggered | Verify the breaker size matches charger's configured amperage. Reduce amperage setting in app if on a smaller circuit. |
| Red / ERR-003 | Overvoltage or undervoltage | Check supply voltage with a multimeter (should be 220–250V for 240V circuits). Contact your utility if voltage is consistently outside this range. |
| Red / ERR-007 | Communication error with vehicle | Disconnect and reconnect the J1772 plug. Clean connector pins. Try a different vehicle if available to isolate the issue. |
| Yellow pulsing | Firmware update in progress | Do not unplug. Wait 5–15 minutes for completion. |
Lectron V-Box 48A
The Lectron V-Box uses a simple LED indicator strip on the front of the unit. Since it has no WiFi, all diagnostics are done through the LED pattern alone.
| LED Pattern | Meaning | Fix |
|---|---|---|
| Solid green | Powered on, ready | Normal standby |
| Solid blue | Charging in progress | Normal operation |
| Red — 2 blinks | Ground fault / GFCI trip | Disconnect vehicle, press the reset button on the unit, reconnect. Check connector and outlet for moisture. |
| Red — 3 blinks | Stuck relay / welded contactor | Power cycle at the breaker. If it persists, this is a hardware failure — contact Lectron support for warranty replacement. |
| Red — 4 blinks | Over-temperature protection | Let the unit cool down. Ensure adequate ventilation around the charger. Avoid charging in direct sunlight during extreme heat. |
| Yellow solid | Vehicle connected but not charging | Check if vehicle has a charge schedule set. Ensure the vehicle's charge port is fully latched. |
Grizzl-E Classic
The Grizzl-E uses a single multi-color LED on the front face. Its rugged design means fewer electronic components to fail, but when issues do arise, the LED blink patterns are your only diagnostic tool.
| LED Pattern | Meaning | Fix |
|---|---|---|
| Solid green | Powered on, standby | Normal — ready to charge |
| Solid blue | Vehicle connected, charging | Normal operation |
| Red — 2 blinks | GFCI fault detected | Power cycle at breaker (off 30 seconds, then on). Inspect the J1772 connector for moisture, dirt, or bent pins. |
| Red — 3 blinks | Relay stuck closed | This is a hardware issue. Power cycle first. If it recurs, the internal relay needs replacement — contact Grizzl-E support. |
| Red — 4 blinks | Pilot signal error (no communication with vehicle) | Disconnect and firmly reconnect the J1772 connector. Clean the pins. If the problem persists with multiple vehicles, the charger's pilot circuit may be faulty. |
| Alternating red/green | Internal temperature too high | Allow the unit to cool. Check that ventilation slots are not blocked. In extreme heat, consider mounting in a shaded location. |
Emporia Energy Smart Level 2
The Emporia Smart uses a front LED ring and provides detailed diagnostics through the Emporia Energy app, including real-time power monitoring.
| LED Pattern / App Alert | Meaning | Fix |
|---|---|---|
| Green ring | Connected to WiFi, standby | Normal |
| Blue ring | Charging in progress | Normal |
| Red ring — "Ground Fault" | GFCI protection triggered | Reset via the app or power cycle at the breaker. If triggered repeatedly, check the outlet grounding and connector for moisture. |
| Yellow ring — "Power Limited" | Load management active — charger has reduced power to stay within panel capacity | This is normal behavior if you have Emporia's energy monitoring CT clamps installed. The charger is protecting your panel from overload. It will increase power automatically when other household loads decrease. |
| Flashing yellow — "No WiFi" | Lost connection to WiFi network | The charger will continue charging without WiFi, but you lose app control. Check your router. Re-run WiFi setup in the app if needed. |
| Red ring — "Over Temperature" | Internal temperature exceeded safe threshold | Allow charger to cool. Charging will resume automatically once temperature drops. Ensure proper ventilation and avoid direct sun exposure in summer. |
JuiceBox (Enel X Way)
The JuiceBox series uses a front-panel LED bar and the JuiceNet app (now Enel X Way app) for detailed status information.
| LED Pattern / App Code | Meaning | Fix |
|---|---|---|
| Green bar | Ready, standby | Normal |
| Blue bar (filling) | Charging in progress | Normal |
| Red bar / "Fault 03" | Ground fault detected | Press the GFCI reset button on the front of the unit. If that does not clear it, power cycle at the breaker. Persistent faults often indicate moisture in the connector or a wiring issue. |
| Red bar / "Fault 06" | Pilot signal error | The charger cannot communicate with the vehicle. Disconnect and reconnect the J1772 plug firmly. Check for bent or corroded pins. |
| Red bar / "Fault 09" | Overcurrent detected | Verify breaker size matches charger amperage setting. Reduce amp setting in the JuiceNet app. If current draw is correct and fault persists, contact support. |
| Yellow bar / "Fault 14" | Over-temperature | Allow unit to cool. Check ventilation. The JuiceBox will automatically resume once it returns to a safe operating temperature. |
| All LEDs off | No power | Check breaker and wiring. Verify the GFCI on the JuiceBox front panel is not tripped. |
Tesla Wall Connector
The Tesla Wall Connector (Gen 3) uses a front LED strip that changes color and pattern. Tesla owners can also check detailed diagnostics through the Tesla app under the charging section.
| LED Pattern | Meaning | Fix |
|---|---|---|
| Solid green | Power on, ready — no vehicle connected | Normal standby — no action needed |
| Green blinking | Charging in progress | Normal operation — charge rate varies by vehicle |
| Solid red | Ground fault detected | Reset the circuit breaker (off 30 seconds, then on). Check wiring connections at the Wall Connector terminal block. Inspect the charge handle for moisture or debris. If persistent, test for proper grounding at the panel. |
| Yellow / Amber | Power sharing communication error | If multiple Wall Connectors are linked via power sharing, check the network cable (Cat5/6) between units. Ensure all connectors are seated firmly. If using WiFi-based power sharing, verify the WiFi connection in the Tesla app. A single Wall Connector showing yellow may indicate a firmware issue — check for updates via the Tesla app. |
| No lights | No power reaching the unit | Check the circuit breaker (60A double-pole for most installations). Verify wiring at the Wall Connector terminal block — loose connections are the most common cause. If the breaker trips immediately when turned on, there is a short circuit in the wiring that requires an electrician. |
BougeRV Level 2 Charger
The BougeRV uses a simple LED indicator on the control box. Since it has no WiFi or app, all diagnostics rely on the LED color and pattern.
| LED Pattern | Meaning | Fix |
|---|---|---|
| Solid green | Normal charging in progress | Normal operation — no action needed |
| Red solid | Overcurrent protection triggered | Reduce the charging amperage setting on the control box (try 24A or 16A). Check that the outlet and circuit breaker are properly rated for the charger’s draw. If on a shared circuit, ensure no other high-draw appliances are running simultaneously. Inspect the NEMA 14-50 plug for signs of heat damage or melting. |
| Red blinking | Ground fault detected | Disconnect the charger, reset by unplugging for 30 seconds, then reconnect. Check if the outlet has its own GFCI protection (double GFCI conflict). Inspect the J1772 connector for moisture or dirt. If charging outdoors, ensure the control box is protected from rain. Persistent ground faults may indicate a wiring issue at the outlet — have an electrician check grounding. |
| Blue solid | Vehicle connected, standby — not currently drawing power | Check if the vehicle has a charge schedule set. Ensure the charge port is fully latched. Some vehicles wait briefly before beginning to draw power — this is normal. |
| No lights | No power to the unit | Check the outlet and circuit breaker. Try plugging the charger into a different outlet to rule out a charger-side failure. |
Quick Troubleshooting Flowchart
1. Is the charger getting power?
→ No lights at all? Check breaker, outlet, and GFCI reset
→ Lights on but not charging? Continue to step 2
2. What color is the LED?
→ Red/Orange: Error detected — check error code table above for your brand
→ Yellow/Amber: Warning — usually communication or temperature issue
→ Blue/Green blinking: Charging normally or waiting for schedule
3. Is charging slow?
→ Check: outlet amperage, cable condition, vehicle charge limit setting
→ Temperature below 32°F? Battery thermal management may limit speed
4. Still not working?
→ Try: power cycle (unplug 30 sec), firmware update, factory reset
→ If persistent: contact manufacturer or licensed electrician
GFCI Trips & Ground Faults
GFCI (Ground Fault Circuit Interrupter) trips are the single most common EV charger problem. If your charger has ever stopped mid-session with a red light and refused to restart, there is a very good chance a ground fault was the cause. Understanding why this happens and how to fix it will save you from unnecessary service calls and missed charges.
What Is a GFCI and Why Do EV Chargers Have One?
A GFCI monitors the current flowing through the hot and neutral wires of a circuit. Under normal conditions, these should be perfectly balanced — every amp that flows out through the hot wire returns through the neutral wire. If the GFCI detects even a small difference (typically 4–6 milliamps), it means current is leaking somewhere it should not be — possibly through a person, through water, or through a ground path. The GFCI trips instantly to prevent electrocution or fire.
All Level 2 EV chargers sold in the US have a built-in GFCI as required by UL certification. This is separate from any GFCI protection on the circuit itself. In fact, having both a GFCI breaker in the panel and the charger's built-in GFCI is a common source of nuisance tripping (more on that below).
Top Causes of GFCI Trips
1. Moisture in the J1772 connector. This is the most frequent cause. Rain, condensation, morning dew, or even high humidity can deposit moisture on the connector pins or inside the vehicle's charge port. Even a tiny amount of water creates a current path that the GFCI interprets as a ground fault. Fix: Wipe the connector dry with a clean cloth. Blow into the charge port to clear condensation. Store the connector in its holster (facing down) when not in use. For outdoor installations, consider a weatherproof connector holster or J1772 plug cover.
2. Dual GFCI protection (double protection nuisance trip). If your electrician installed a GFCI breaker in the panel for the EV charger circuit, you now have two GFCIs in series — the breaker and the charger's built-in GFCI. These can interfere with each other, causing phantom trips even when no actual ground fault exists. Fix: Have your electrician replace the GFCI breaker with a standard breaker of the same amperage. The charger's built-in GFCI provides adequate ground fault protection. NEC Article 625.54 does not require a GFCI breaker when the EVSE has an integral GFCI — which all UL-listed units do. For more on circuit requirements, see our dedicated circuit guide.
3. Damaged or worn charging cable. Over time, the cable insulation can develop micro-cracks, especially if the cable is frequently run over by car tires, kinked during storage, or exposed to UV radiation. These cracks allow moisture to reach the conductors, causing intermittent ground faults. Fix: Inspect the entire length of the cable for visible damage — cuts, abrasion, crushed spots, or exposed copper. If you find damage, stop using the cable immediately and contact the manufacturer for a replacement. Never repair a high-voltage EV charging cable with electrical tape.
4. Faulty vehicle-side charging electronics. Sometimes the ground fault originates in the vehicle's onboard charger, not in the EVSE. If your charger trips consistently with one vehicle but works fine with another, the problem is likely vehicle-side. Fix: Have the vehicle's charge port and onboard charger inspected at the dealership. This is covered under the vehicle's drivetrain or EV component warranty.
5. Wiring issues at the outlet or panel. Loose neutral connections, shared neutrals between circuits, or improper grounding can all cause leakage current that triggers the GFCI. This is particularly common in older homes with aging wiring. Fix: Have a licensed electrician inspect the circuit wiring from panel to outlet. Proper grounding and tight connections are essential for reliable EV charging. See our installation guide for what to expect from a professional install.
Step-by-Step GFCI Reset Procedure
- Disconnect the J1772 connector from the vehicle
- Turn off the circuit breaker at the electrical panel
- Wait 30 seconds (this fully discharges the charger's internal capacitors)
- Turn the breaker back on
- Wait for the charger's standby light (usually solid green) — this confirms the internal self-test passed
- Reconnect the J1772 connector to the vehicle
- If the charger has a GFCI test/reset button (JuiceBox, some ChargePoint models), press the reset button instead of cycling the breaker
If the GFCI trips again immediately upon reconnecting the vehicle, the fault is either in the cable, the connector, or the vehicle's onboard charger. If it trips after charging for some time, look for a heat-related issue (thermal expansion opening a micro-crack in the cable) or an intermittent wiring problem.
Charger Won't Start / No Power
You plug in your EV and nothing happens. No lights on the charger, no response from the vehicle, and no error code to work with. This is the second most common complaint after GFCI issues, and the cause is usually something simple.
Check the Circuit Breaker First
The most common reason for a completely dead charger is a tripped circuit breaker. EV charger circuits use 240V double-pole breakers (two breaker handles ganged together). When a double-pole breaker trips, the handle may move to a middle position between ON and OFF — this is easy to miss if you are just glancing at the panel.
To reset: Push the breaker handle firmly to the OFF position first, then flip it back to ON. Simply pushing a tripped breaker toward ON without going through OFF first may not reset it. If the breaker trips again immediately or within seconds, stop — there is a short circuit or ground fault in the wiring that needs professional diagnosis.
NEMA 14-50 Outlet Issues (Plug-In Chargers)
If your charger plugs into a NEMA 14-50 or similar outlet, the outlet itself can be a failure point:
- Loose connections: The weight of the charger plug combined with the cable can gradually loosen the outlet connections over time, especially if the cable pulls at an angle. A loose connection creates resistance, which generates heat, which can melt the outlet or cause intermittent power loss. Signs: discoloration around the outlet, a burning smell, or the plug feeling warm/hot to the touch. Fix: Turn off the breaker, remove the outlet cover, and have an electrician check and retighten the wire connections. If there is any melting or discoloration, the outlet must be replaced.
- Worn contacts: After years of plugging and unplugging, the outlet's internal contacts can lose their grip. The plug may feel loose or wobbly. Fix: Replace the outlet. Use a commercial-grade NEMA 14-50 outlet (around $15–$20 at any hardware store) rather than the cheapest residential option.
- Wrong outlet type: Make sure you have the right outlet for your charger. A NEMA 14-50 has 4 prongs (two hot, one neutral, one ground). A NEMA 6-50 has 3 prongs (two hot, one ground, no neutral). Using an adapter or forcing a mismatched plug is a fire hazard.
Hardwired Connection Problems
Hardwired chargers eliminate the outlet as a failure point, but they can still lose power from:
- Loose wire nuts or terminal connections inside the charger's junction box. Thermal cycling (heating and cooling with each charge session) can gradually loosen connections. Fix: Turn off the breaker, open the charger's wiring compartment, and check that all connections are tight. If you are not comfortable working inside the unit, call an electrician.
- Tripped internal breaker or fuse. Some chargers have an internal fuse or breaker in addition to the panel breaker. Check your charger's manual for location and replacement procedure.
- Wire damage. Rodents are notorious for chewing through wire insulation in garages and attics. If the charger suddenly loses power and the breaker is fine, visually inspect the wiring run for any signs of animal damage.
Vehicle-Side "No Charge" Issues
If the charger lights are on and showing normal standby but the car will not start charging when you plug in:
- Charge port not fully latched. The J1772 connector must click firmly into the vehicle's charge port. A partial connection will not initiate charging. Push until you hear/feel the click.
- Charge schedule conflict. Many EVs have built-in charge scheduling that overrides the charger. Check your vehicle's infotainment system for "scheduled charging" or "departure time" settings. Disable them to charge immediately.
- 12V battery issue. Your EV's 12V accessory battery controls the charge port latch and communication with the EVSE. A weak or dead 12V battery can prevent charging even though the main traction battery is fine. This is a known issue on older Teslas and some Nissan LEAFs.
- Using an extension cord. Running an EV charger through an extension cord can cause voltage drop that prevents the charger from starting. This is one of many reasons extension cords are not recommended for EV charging.
Slow Charging / Reduced Power
Your charger is working, but it seems to be charging much slower than expected. Instead of adding 30 miles of range per hour, you are getting 15 or 20. This is usually not a malfunction — it is the charger or vehicle intentionally reducing power for safety or efficiency reasons.
Temperature Throttling
Both the charger and the vehicle will reduce charging speed when temperatures are outside the optimal range:
- Charger over-temperature: If the charger's internal temperature exceeds its rated operating range (typically 104–122°F / 40–50°C), it will throttle power output to prevent component damage. This is common during summer afternoon charging in direct sunlight, especially for chargers mounted on south-facing walls. The charger will show a yellow/amber LED on most brands.
- Battery too cold: In cold weather, the vehicle's battery management system limits charging current to protect the cells. Lithium-ion batteries cannot accept fast charging when cold (below about 32°F / 0°C) because lithium plating can damage the cells permanently. The vehicle will warm the battery before allowing full-speed charging, which can take 15–30 minutes. For detailed cold-weather strategies, see our cold weather charging guide.
- Battery too hot: Similarly, if the battery is hot from driving (especially after highway driving on a hot day), the vehicle may limit charging speed until the battery cools to a safe temperature.
Voltage Drop
Voltage drop is a hidden culprit behind slow charging that many owners never suspect. When voltage drops, the charger automatically reduces current draw to stay within safe power limits. The result: slower charging.
Common causes of voltage drop:
- Long wire runs: If the wiring from your electrical panel to the charger is more than 50 feet, voltage drop can be significant — especially on thinner wire gauges. A 100-foot run of 8 AWG wire on a 40-amp circuit loses about 4.5% voltage, which is right at the NEC's maximum recommended 3–5% threshold.
- Undersized wire: If the original installer used wire that is technically compliant but on the thin side for the run length, voltage drop during sustained high-current charging can reduce the effective voltage at the charger.
- Loose connections: Any loose wire connection (at the panel, junction boxes, or outlet) adds resistance, which causes voltage drop and heat. This is both a performance issue and a fire hazard.
- Utility voltage sag: During peak demand periods (hot summer afternoons when every AC unit is running), utility voltage can sag below the nominal 240V. If your home is at the end of a long utility run, this effect is more pronounced.
Diagnosis: Use a multimeter to measure voltage at the outlet or charger terminals while the charger is running at full power. If voltage is below 228V (5% drop from 240V), you have a voltage drop problem. An electrician can identify whether the cause is wire sizing, distance, or connections.
Vehicle Onboard Charger Limitations
Every EV has a maximum AC charging rate determined by its onboard charger, regardless of what the EVSE can deliver:
- Most non-Tesla EVs: 7.2 kW to 11.5 kW onboard charger (32A to 48A at 240V)
- Some older/base-model EVs: 3.6 kW to 6.6 kW onboard charger (limits charging to 16A–28A even with a 48A EVSE)
- Tesla Model 3/Y: 11.5 kW (48A) onboard charger standard
- PHEVs (plug-in hybrids): Often only 3.3 kW to 7.2 kW, making a fast EVSE unnecessary
If your car's onboard charger maxes out at 32A, installing a 48A EVSE will not make it charge faster. Check your vehicle's specifications before investing in a higher-amperage charger.
Load Management Throttling
Smart chargers with load management features (Emporia Smart, Wallbox Pulsar Plus with Power Boost) will intentionally reduce charging power when other heavy loads are active in your home. This is by design — the charger is protecting your panel from overload. You will notice slower charging when running the dryer, oven, AC, or other 240V appliances simultaneously. Charging speed will return to normal automatically once those loads stop.
WiFi / App Connectivity Issues
Smart EV chargers rely on WiFi for app control, scheduling, energy monitoring, and firmware updates. When the WiFi connection drops, the charger will still charge your vehicle (all smart chargers fall back to offline mode), but you lose remote control and monitoring. Here is how to fix connectivity problems.
Common WiFi Problems and Fixes
1. Charger cannot connect during initial setup.
- Most EV chargers only support 2.4 GHz WiFi, not 5 GHz. If your router uses the same network name (SSID) for both bands, the charger may try to connect to the 5 GHz band and fail. Fix: Temporarily disable the 5 GHz band on your router, or create a separate 2.4 GHz network for the charger.
- Check that your WiFi password does not contain special characters that the charger's setup interface cannot handle. Stick to letters, numbers, and basic symbols.
- Ensure the charger is within WiFi range. Garage walls (especially metal-clad or concrete) can significantly attenuate WiFi signals. If your charger is more than 30–40 feet from the router with walls in between, signal strength may be insufficient.
2. Charger connects but frequently disconnects.
- Signal strength: If the WiFi signal at the charger's location is weak (1–2 bars), the connection will be unreliable. Use a WiFi analyzer app on your phone to check signal strength at the charger location. You need at least -70 dBm for reliable operation.
- Router congestion: If you have many WiFi devices (30+), your router may struggle to maintain all connections. Most consumer routers handle 15–25 simultaneous connections well.
- Fix for weak signal: A WiFi extender ($20–$40) placed between the router and charger, or a dedicated access point in the garage, will solve most range issues.
3. App shows "offline" but charger is working.
- The charger may have lost its cloud connection (to ChargePoint, Wallbox, Emporia, or Enel X Way servers) even though WiFi is connected. This is usually a temporary server-side issue. Check the manufacturer's social media or status page for outage reports.
- Power cycle the charger to force a fresh cloud connection.
- Update the app to the latest version — older app versions sometimes lose compatibility with server updates.
4. Firmware update stuck or failed.
- Never unplug a charger during a firmware update. If a firmware update appears to be stuck (yellow/amber LED for more than 30 minutes), power cycle the charger at the breaker.
- After the reboot, the charger should either complete the update or revert to the previous firmware version.
- Persistent firmware update failures usually indicate a weak WiFi connection. Improve signal strength before trying again.
When WiFi Does Not Matter
If WiFi connectivity is a constant headache and you do not need scheduling or energy monitoring, consider switching to a non-WiFi charger like the Grizzl-E Classic or Lectron V-Box. These chargers have no WiFi, no app, and nothing to disconnect — they just charge. You can always use your vehicle's built-in charging schedule (available on virtually all modern EVs) to control when charging starts and stops, eliminating the need for smart charger scheduling entirely.
Weather & Temperature-Related Problems
EV chargers are electrical devices exposed to the elements, and weather extremes — both hot and cold — cause specific problems that you will not encounter in moderate climates.
Cold Weather Issues (Below 32°F / 0°C)
Frozen charge port. Ice can form around the vehicle's charge port door or inside the port itself, preventing the J1772 connector from inserting or latching properly. Fix: Never force the connector. Use lukewarm (not hot) water to melt ice around the port. Some EV owners keep a small can of lock de-icer in their garage for this purpose. Many modern EVs have a charge port heater that activates during preconditioning — activate preconditioning from the vehicle's app 15–20 minutes before you plan to plug in.
Stiff charging cable. The rubber or TPE jacket on EV charging cables becomes stiff and difficult to coil in extreme cold. This is cosmetic and does not affect charging performance, but it makes handling the cable annoying. Premium cables (like on the Grizzl-E Classic) use cold-rated materials that stay flexible to -30°F. Budget charger cables may become very rigid below 20°F.
Reduced charging speed. As discussed in the slow charging section, cold batteries accept less current. In temperatures below 20°F, you may see charging speeds reduced by 30–50% until the battery warms up. This is a vehicle-side limitation, not a charger problem. For comprehensive cold-weather strategies, see our complete guide to EV charging in cold weather.
Condensation-triggered GFCI trips. When a cold charger or cable is brought into a warm garage (or when temperatures swing from cold night to warm morning), condensation can form on the connector pins and trigger a GFCI trip. Fix: Wipe the connector dry before plugging in. Store the connector in its holster with the pins facing down so condensation drains away.
Hot Weather Issues (Above 95°F / 35°C)
Thermal throttling. In direct sunlight during summer, charger surface temperatures can exceed 140°F (60°C), triggering internal over-temperature protection. The charger will reduce power output (typically by 25–50%) or pause charging entirely until it cools. Fix: Mount the charger on a north-facing wall or in a shaded area if possible. Charge during cooler evening/nighttime hours. A simple sun shade over the charger can reduce surface temperature by 20–30°F.
Cable insulation degradation. Prolonged UV exposure degrades the charging cable's outer jacket, making it brittle and prone to cracking. Cracks allow moisture ingress, which causes GFCI trips. Fix: Store the cable out of direct sunlight when not in use. Chargers with NEMA 4 or NEMA 4X enclosures (like the Grizzl-E Classic) are designed for outdoor UV exposure, but the cable itself is still vulnerable.
Outlet overheating. In hot environments, NEMA 14-50 outlets are already running warm from ambient heat. Add the sustained 40–50 amp load of EV charging, and marginally adequate connections can overheat. Warning signs: discolored outlet, burning smell, plug too hot to touch comfortably. Fix: Immediate action — stop charging, turn off the breaker, and have an electrician inspect and replace the outlet. This is a fire hazard and should not be ignored.
Rain and Water Exposure
All chargers listed on our best cheap Level 2 chargers page are rated for outdoor use (NEMA 3R, 4, or 4X enclosures). Charging in the rain is perfectly safe — the J1772 standard is designed for wet conditions, and the charger's GFCI will trip instantly if water causes a current leak. However:
- Do not leave the J1772 connector hanging in a puddle or lying in standing water
- Do not charge if the connector pins are visibly wet — wipe dry first
- Do store the connector in its holster with pins facing down when not in use
- Do ensure the charger is mounted at least 18 inches above ground level to avoid splash zone exposure
When to Call an Electrician vs DIY Fix
Knowing when you can safely troubleshoot yourself and when you need a licensed electrician is critical. EV chargers operate at 240 volts and up to 60 amps — more than enough to cause serious injury or death from electrocution. When in doubt, turn off the breaker and call a professional.
Safe DIY Troubleshooting
The following are safe for any EV owner to do without professional help:
| Issue | DIY Fix | Time |
|---|---|---|
| GFCI trip (first occurrence) | Power cycle at breaker, dry connector, reconnect | 2 min |
| Charger LED shows error | Look up code in manual/app, power cycle | 5 min |
| WiFi disconnected | Re-run setup in app, check signal strength | 10 min |
| Slow charging | Check vehicle settings, charge schedule, battery temp | 5 min |
| Frozen charge port | Lukewarm water, precondition vehicle | 10 min |
| Firmware update stuck | Power cycle, improve WiFi, retry | 15 min |
| Vehicle won't start charging | Check charge schedule, re-seat J1772, check 12V battery | 10 min |
Call an Electrician Immediately
These situations require a licensed electrician — do not attempt to fix them yourself:
| Issue | Why It's Dangerous | What the Electrician Will Do |
|---|---|---|
| Breaker trips repeatedly | Indicates a short circuit or sustained overcurrent — potential fire hazard | Test circuit for shorts, verify wire gauge and connections, check for damaged insulation |
| Burning smell or discolored outlet | Arcing or melting connections — immediate fire risk | Replace outlet and wiring, inspect junction boxes, verify torque on all connections |
| Charger or plug is hot to the touch | Excessive resistance causing dangerous heat buildup | Check for loose connections, replace damaged outlet or charger wiring compartment connections |
| GFCI trips on every charge attempt | Persistent ground fault in wiring (not charger/vehicle) | Megger test the circuit, check grounding, inspect all junction boxes for moisture or damage |
| Voltage at outlet is below 220V or above 250V | Utility or panel issue causing under/overvoltage | Test at panel, contact utility, install voltage monitoring if needed |
| Exposed wiring or damaged conduit | Shock and fire hazard | Repair or replace wiring and conduit |
How to Find a Qualified EV Charger Electrician
Not every electrician has experience with EV charger installations. Look for:
- EVITP certification (Electric Vehicle Infrastructure Training Program) — this is the gold standard for EV charger installers
- Experience with 240V/50–60A circuits specifically (ask how many EV chargers they have installed)
- Knowledge of NEC Article 625 (EV-specific code requirements)
- Willingness to pull a permit — a proper EV charger installation should be permitted and inspected in most jurisdictions
For a complete walkthrough of the installation process, including finding an electrician, permits, and what the work involves, see our guide to installing an EV charger at home.
Cost of Professional Troubleshooting
A typical electrician service call for EV charger troubleshooting costs $75–$200 for the diagnostic visit, plus parts and labor if repairs are needed. Common repair costs:
- Replacing a NEMA 14-50 outlet: $100–$200 (parts + labor)
- Tightening loose panel connections: $75–$150
- Replacing a faulty breaker: $100–$250
- Rewiring a damaged circuit run: $300–$1,000+ depending on length and accessibility
Compare these costs to the price of a new charger — if your charger itself has failed (stuck relay, damaged internal board), it is often cheaper to buy a replacement like the Lectron V-Box ($304) or Grizzl-E Classic ($300) than to repair the old unit.
Recommended Products
As an Amazon Associate, we earn from qualifying purchases at no extra cost to you. Learn more
Lectron V-Box 48A
Lectron
Our top-rated budget Level 2 charger. Delivers 48A (11.5 kW) for the fastest home charging at this price. Built-in GFCI, NEMA 4 enclosure, and 24-foot cable. No WiFi — zero connectivity issues.
Grizzl-E Classic 40A
Grizzl-E
The most durable home EV charger on the market. NEMA 4X aluminum enclosure rated from -30°F to 122°F. Adjustable amperage (16/24/32/40A). Designed and tested in Canada for extreme weather reliability.
Related Articles & Tools
Frequently Asked Questions
Why does my EV charger keep tripping the GFCI?
What does a red blinking light on my EV charger mean?
Why is my EV charging so slowly on a Level 2 charger?
Can I troubleshoot my EV charger myself or do I need an electrician?
Do EV chargers work in extreme cold or heat?
How do I reset my EV charger?
Why does my EV charger keep tripping the breaker?
Is a blinking red light on my charger dangerous?
When should I call an electrician for my EV charger?
Can a firmware update fix EV charger errors?
CheapEVCharger Editorial Team
Independent EV charging editorial team. We compare home chargers based on manufacturer specifications, verified Amazon customer reviews, and real-time pricing data — never influenced by manufacturers.
Data sources: Product specifications from manufacturer websites, pricing and customer reviews from Amazon.com and Amazon.de, installation costs from industry reports, electricity rates from U.S. EIA and DOE.
Enjoyed this article?
Practical EV home-charging tips, honest charger picks, and NACS-transition updates — straight to your inbox.
No spam. Unsubscribe anytime.